Easy Chinese Lantern for Kids

How are you and your family celebrating Chinese New Year 2020?
This year, Saturday 25th January marks the start of the Chinese Zodiac Year of the Rat.
The celebrations start with the Lunar New Year and end with the Chinese Lantern Festival on the 8th of February 2020, so you have plenty of time to fit in some festivities.
Whether you are attending London’s annual Chinese New Year Parade in Chinatown, eating some traditional Chinese food for good luck or clearing out clutter from last year, our easy Chinese Lantern craft will bring plenty of good fortune and blessings to your home for 2020.
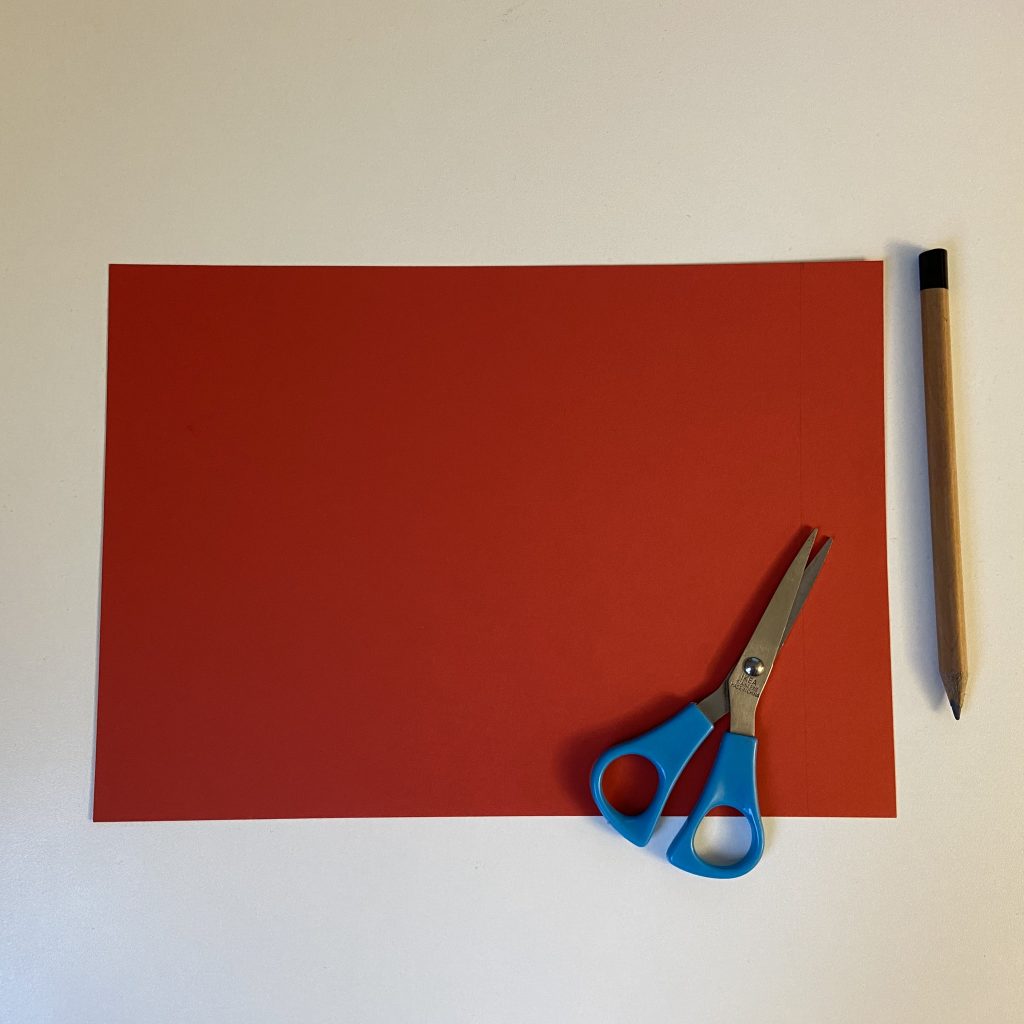
Things you will need:
- A4 Coloured Paper/Card
- Safety Scissors
- Stapler or Tape
- Glue
- Ruler
- Pencil
- Rubber
- And we saved the best till last… DECORATIONS!
Ran out of craft supplies at home? Did you know with The Family Pass you can save on great family brands including Cass Art and Ryman, which means you can get crafty for less! Try The Family Pass for 30 days for only £1 here.
Now you know what you need to get crafty with the kids, it’s time to get started!
- Choose your paper. Red and gold are normally used as the colours are believed to symbolise happiness and good fortune.
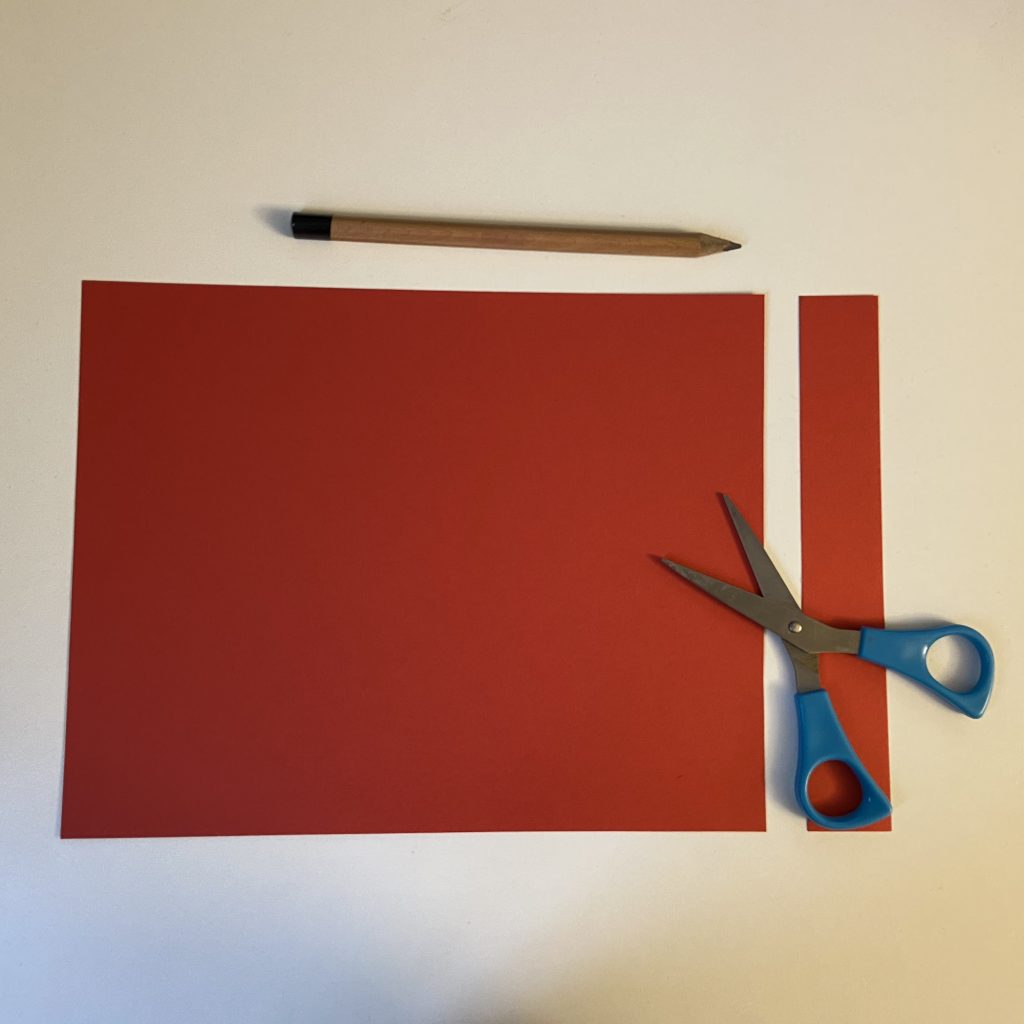
- Cut a 1 inch strip off the short side of the card or paper. This will become your lanterns handle so keep it safe.
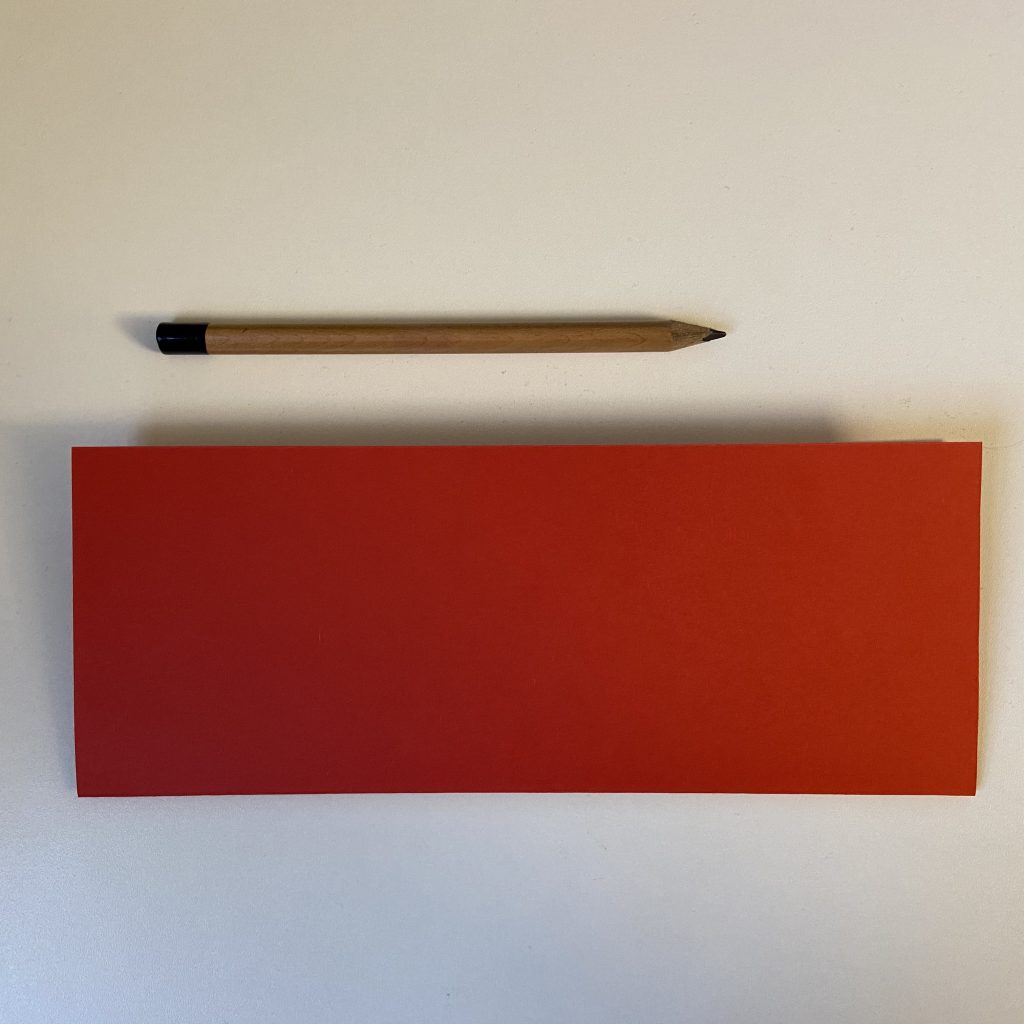
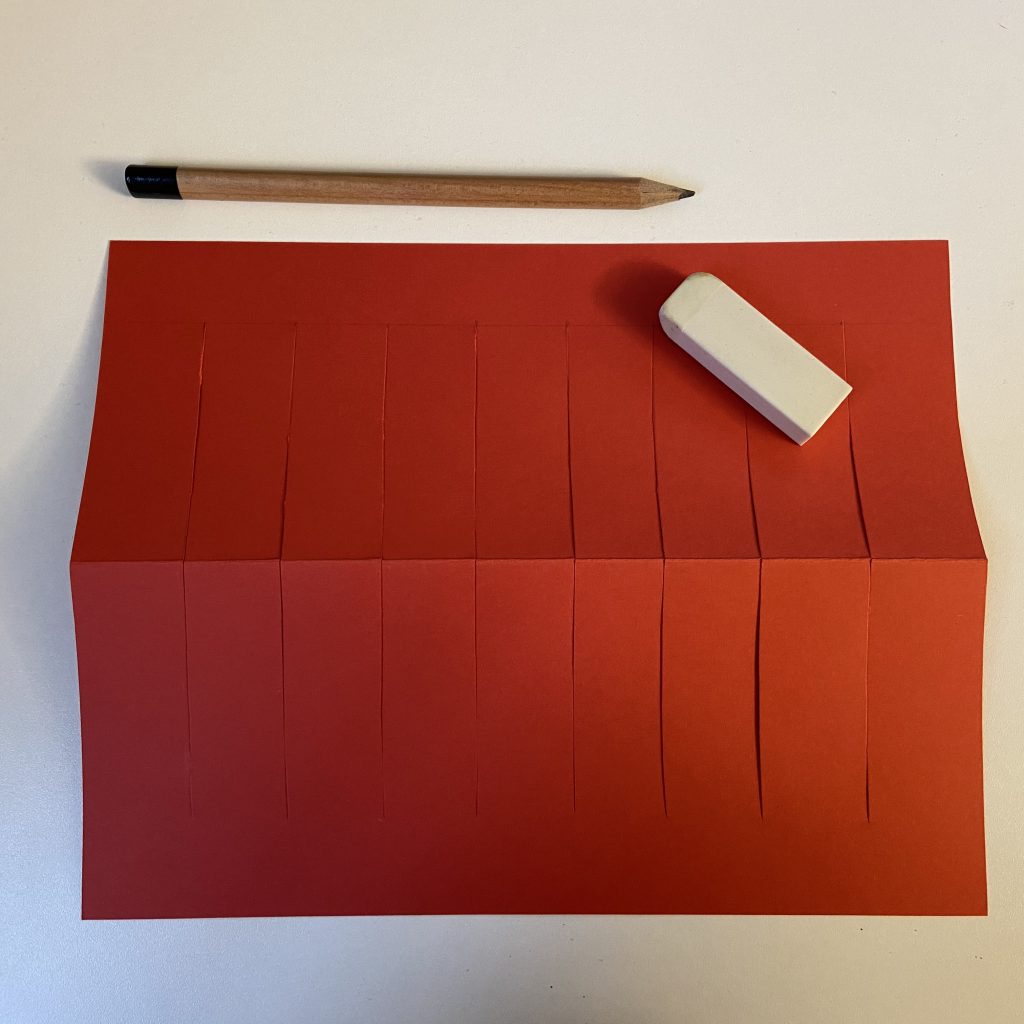
- Fold the paper in half lengthwise.
- With a pencil, draw a horizontal line about 1inch from the top of the paper. This is your guide for cutting.
- Mark 1 inch sections along the line to make sure the slits in your lantern are spread out evenly.
- Draw a line from the fold to each mark to give you a line to follow, we will rub these out later so make sure they are light!
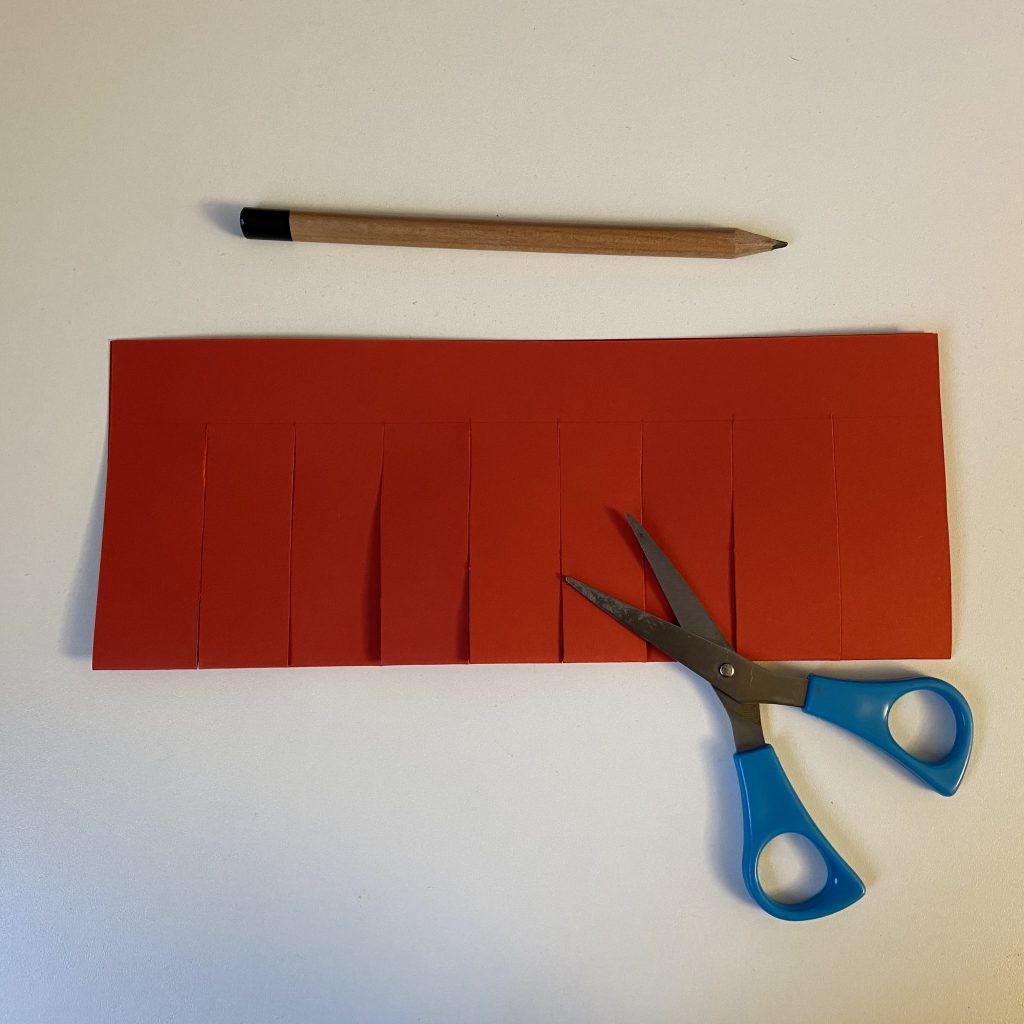
- Cut from the fold to the horizontal line, following the guideline you just drew.
- Unfold the paper and rub out any of your pencil lines that you can still see.
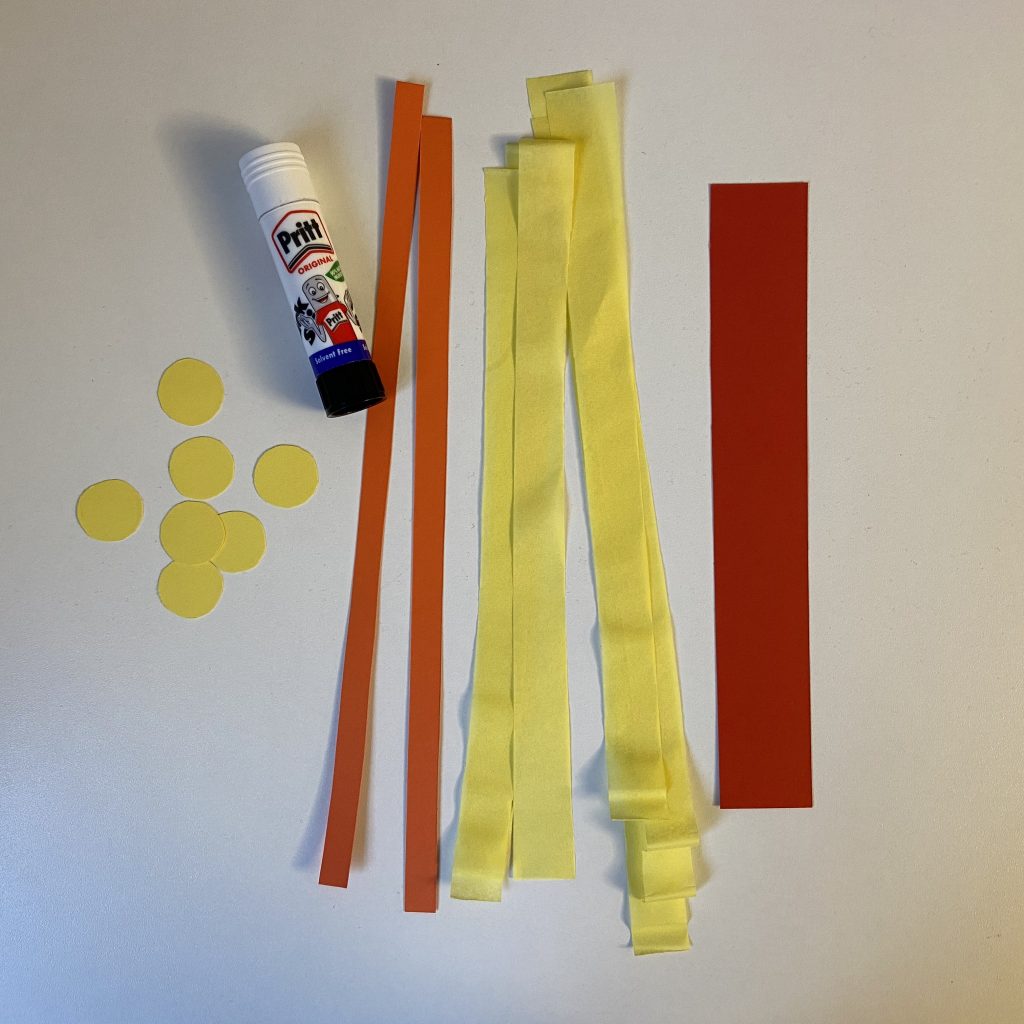
- Here comes the fun part! Decorate the top and bottom edge of your lantern with either some paint, glitter, stick on shapes or just whatever you fancy.
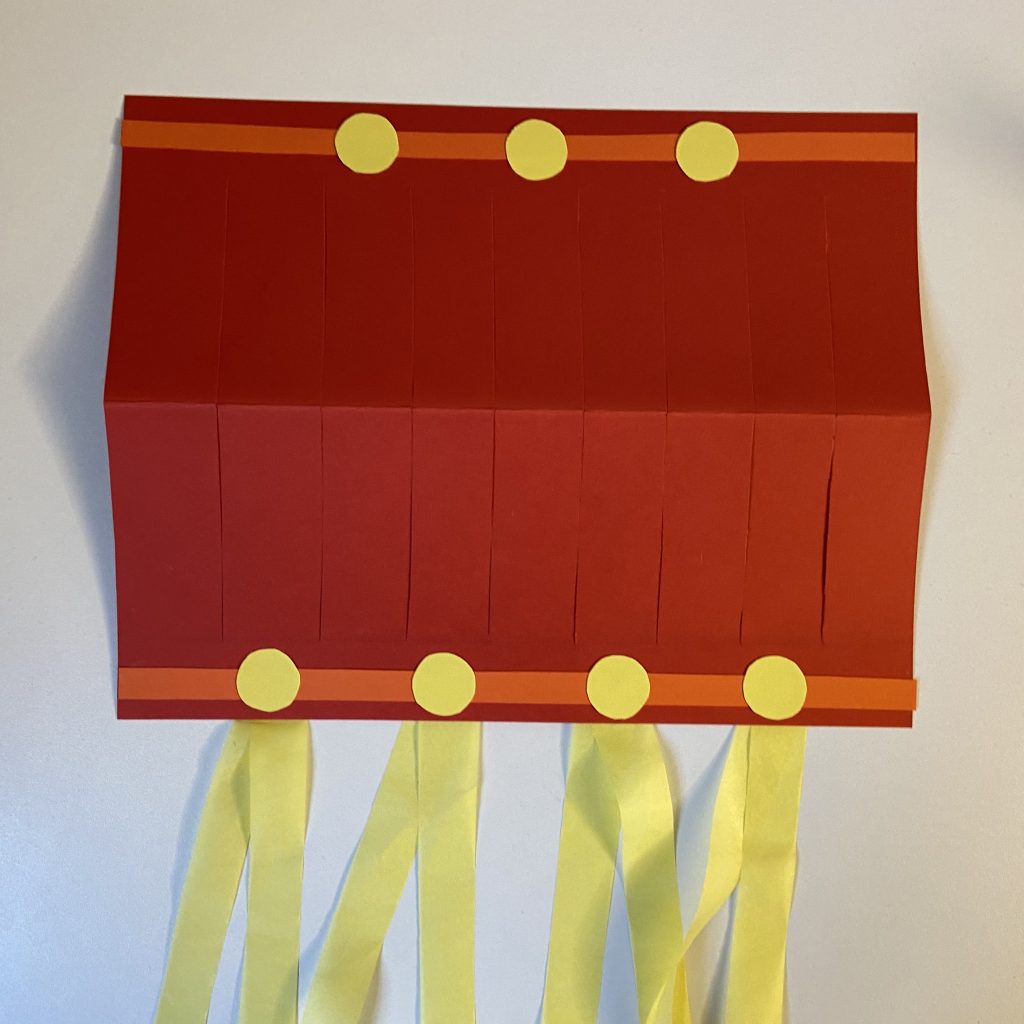
- Make sure you leave about a finger space gap at each end to allow you to glue the lantern together.
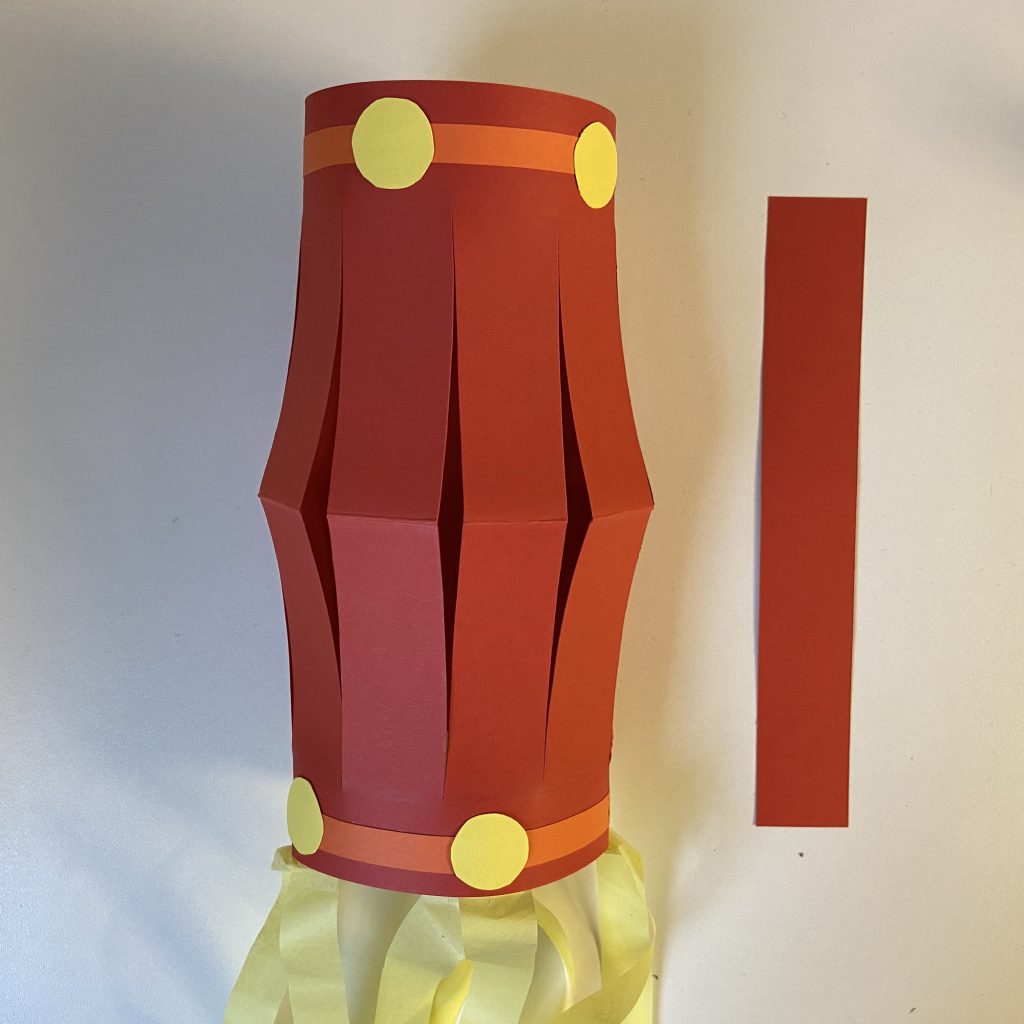
- Pull the top edges of your lantern together to form a tube shape. Make sure they overlap about a finger space and staple together.
- Repeat this for the bottom of your lantern.
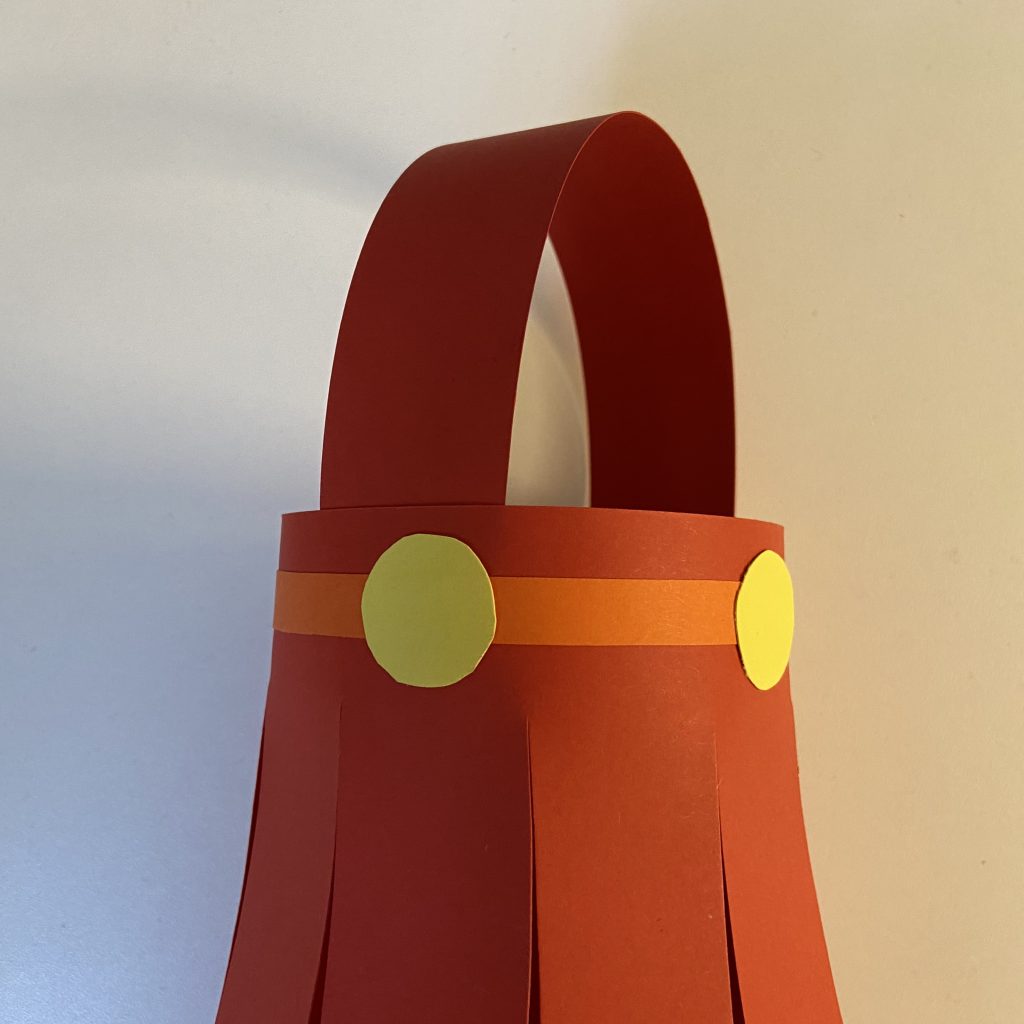
- Grab the handle you made earlier and glue the ends to the inside of the top of your lantern.
- Leave to dry.
- Once the lantern is dry you can decorate the handle or even add some more to the lantern itself!
- Try adding some streamers to the bottom of the lantern. These look great when the lantern blows in the wind.
- Hang your Chinese Lantern up in your home and start celebrating!
Check the step by step video out here!